Minggu, 02 November 2014

Climate Control for Your Collection

We all worry about road damage when we take our cars out for a drive but a lot of the damage to our cars comes from the place where we have them stored. Remember that the first rule of collecting is that you should do no harm. This means we need to pay a lot more attention to the environment where our cars reside when they're not being driven.
Before you spend a lot of money determine what current conditions exist. A data logger can save you a lot of money.

Talk to your HVAC specialist about ducting systems
Stabilization: Restoration is a type of conservation. It refers to an attempt to bring a cultural property (your car) closer to its original appearance. Restoring a car means taking it back to the way it was originally constructed. 

Conservation is slightly different. It should really be thought of as stabilization. Conservation is an attempt to maintain the integrity of a cultural property by minimizing deterioration. The primary goal of conservation and preservation is to prolong the existence of your car.

Cam Ingram, a partner in Rhode Scholars, sees more collections in a year than most of see in our lifetimes. Cam can tell you horror stores of really nice cars residing in buildings that are destroying the very cars they house.
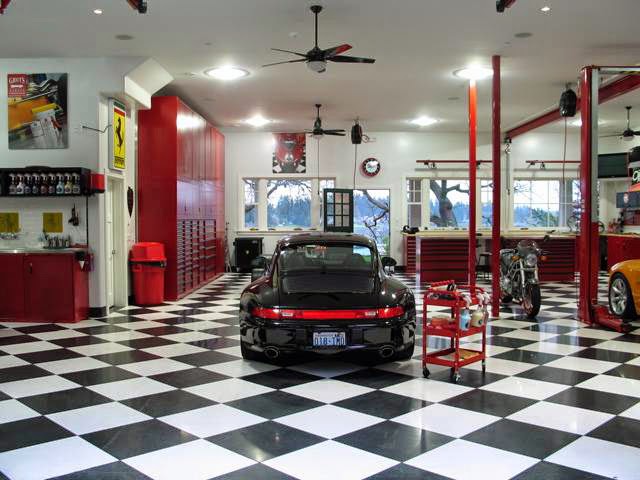
Fans help a great deal.  They're especially good if you have high ceilings.
Cam feels that you really need to work with an expert on protecting your cars. Each collection space offers a set of challenges with humidity and temperature issues. 

In many instances it's about finding a talented local HVAC person that can diagnose the collection space issues and remedy them accordingly. You can easily make an initial assessment of your storage space though. 

Temperature: You want to avoid extreme temperature fluctuations in your storage area. Your home garage may be the worst possible place to store a collectible car. Every time you open the door all sorts of bad things happen. The worst is the huge temperature swing. These temperature swings are the biggest problem with your home garage.

This has to be an absolute nightmare when it comes to climate control.
It can be done but it's going to be expensive.
The ideal temperature for preservation is around 64 degrees. How many days out of the year is your home garage at 64 degrees?  How many degrees will your garage temperature change in a 24-hour period? The Philadelphia Museum of Art likes a range of 68-degrees to 72-degrees. That’s a four-degree variation over a month’s time.


Humidity: When there's not enough humidity leather can shrink, crack and become very brittle. Even worse mold can grow, and insects can breed, with high humidity. Leather is similar to brake fluid in that it’s hygroscopic (it absorbs and retains moisture). Leather can be damaged by both moisture loss and absorption. 
At a humidity level of 35% or below leather becomes desiccated and readily cracks when handled. At a humidity level of 70% or above mold growth can occur. This mold will break down the very structure of leather as it feeds off the proteins in the leather and on the fatty acids in the leather dressings.

Another facility that's going to get very expensive very quickly.
The monthly electric bill alone will be daunting.
When humidity reaches excessive levels rust develops on metal items. Most museums feel it’s important to keep the relative humidity below 55 percent in areas where they keep important metal artifacts. That should be good rule for your car’s storage area as well.

There’s not a lot of paper in you car but you might have books and photos in the same building where you store your car so you should probably consider that museums try to keep paper stored in locations that have around 35% humidity.

In an ideal world your cars should be stored in an area that has between 45% and 55% humidity. What’s more important though is that the humidity be consistent. Wild fluctuations will cause more damage than any given level. 

Keeping Track of Things
There are some really inexpensive ways to measure and keep track of your humidity and temperature levels.
     Dial Hygrometer - These can be hung on a wall or mounted on a shelf. Most hygrometers don’t use a dial any more but they have a digital readout. Most also record temperatures. They measure temperature and humidity within 3 degrees and you can find them on Amazon.com for around $35.00. The only problem is these inexpensive ones don't record over time but they will give you minimum and maximum readings during the course of a day. 

 Data Logger – These are a step up from the basic model. They can record, display and download temperature and humidity information to a computer for analysis and tracking. A slightly more expensive option is to buy a unit that utilizes an SD card for recording.  They cost around $200 and keep track of both temperature and humidity in an Excel file.


You should do all of this recording before you call in the HVAC specialists. Give them a status report as to where you are. Then explain that you want a humidity level between 45% and 55%. You also want a stable temperature within the 68 to 72 degree range. The first step though is to determine where you actually are. Then you try to close the gap between that number and where you should be. That’s when you have to get your checkbook out.

As Published in:

Minggu, 07 September 2014

1986 C4 Corvette Solo 2

This is the Corvette that Dave Hill and his Corvette engineering staff don't want to know about. The C4s, built from early 1983 (as an '84 model) 'til mid-1996, were former chief engineer Dave McLellan's creation, while Hill gets credit for the '97 and newer C5s. Some folks inside at GM have told us that McLellan deserves more credit for the C5 than he's been given, but that's another story entirely.
Autocross, or Solo 2 in SCCA, is a unique form of competition. You have to drive around on an artificial course that's usually set up in a giant parking lot. You're racing against the clock, not against other cars, and a lap lasts less than a minute. If you think of an autocross as a qualifying lap in racing, you're pretty close. There's no chance to relax and very little opportunity to think about what you're doing. 
Driver ability and a good handling car are the important things for winning in autocross. It also helps for your engine to have a lot of low-end torque and to be hooked to a solid-shifting automatic transmission. When you're driving through cones on narrow courses, wide cars and long wheelbases are hindrances to getting the best time. Early ('84-90) C4s are 176.5 inches long and 71 inches wide on a 96.2-inch wheelbase, while C5s are 179.6 inches long and 73.6 inches wide with a 104.5-inch wheelbase. The same width and long wheelbase that makes a C5 roomy inside and exceedingly stable at high speeds makes it awkward and unwieldy on a tight and twisty autocross course.
The old '85 to '87 Corvettes seem to rule the autocross courses around the United States. These old C4s flat beat everything that's come out of Chevrolet since the mid-'80s. When you look at the SCCA National Championships, you'll always find some of these old torque monsters in the standings.Roger Johnson's yellow '86 is one of the best of these unbeatable autocross Corvettes. It's so competitive that a couple years ago some members of the Corvette engineering team invited Roger and his '86 to the Milford (Michigan) Proving Grounds so their boss could see a real, winning autocross Corvette. Some of the team thought it might be useful if they could get a handle on why this old C4 was able to blow away the brand-new C5s. Of course, it blew away the new Corvettes, right on Chevrolet's home turf.
This yellow '86 is a legend amongst the autocross fraternity. While no one is sure if it's the driver or the car that is great, Johnson's driving ability is something that every Corvette owner who's ever run an autocross aspires to. On the other hand, most autocrossers would like to have his car.
There are several reasons that the '85-87 C4s make wonderful autocross cars. The old L98 just can't be matched for bottom-end torque-it'll damn near pull stumps out of the ground. The LT1s, LT4, LT5s, LS1s, and LS6s are all great horsepower engines, but each and every one of them lacks the raw low-end grunt of the old Tune-Port Injection 350. Fifteen years of technology has produced some great engines, but none of 'em can match the low rpm power of a well-tuned L98.
Roger's car, which he bought brand new, only has about 5,000 miles showing on the odometer. The first thousand or so was on the street. The rest is a lot of Solo 2 runs, a whole lot if you consider that the average run is usually well under one mile, and lots of times closer to a half-mile.
In late 1987 the folks at Chevrolet convinced Roger that the new '88 Corvette with its re-designed, zero-scrub-radius front suspension would be the way to go. He even put the yellow beast up for sale while he prepped a new '88 version. Roger was serious about the '88's prep, so the car was sent to C4 performance guru Kim Baker for special attention. The late John Lingenfelter was made sure that all was perfect within the engine.
There was only one problem. The brand new 1988 Corvette couldn't match the times of the old '86. Nothing that Roger did would make the '88 Corvette competitive with the yellow '86. If Roger Johnson, Kim Baker, and John Lingenfelter's combined expertise couldn't make the '88 run as fast as the older car, all hope was gone. Fortunately, no one had come up with the required cash to purchase the "old car" so the "For Sale" signs were taken off the '86 and placed on the '88. It was back to Old Yellow.
Roger has tried C5s but feels that they have major limitations for competitive autocrossing. A great many other Corvette autocrossers apparently agree with him, as you seldom see a C5 at autocrosses, other than Corvettes-only events. Some have tried, but few have succeeded, except with Z06s, at the SCCA level of competition.
The one thing that Roger Johnson has proven is that if you start off with the "right" car, stick with that car, and develop it, you can have a winner. While most of us try the latest trick part of the week, or maybe even the trick car of the month and stay also-rans, Roger just keeps running up the miles on his old yellow '86, and keeps right on winning.

Here's an interview that someone else did with Roger Johnson. Very interesting. He talks about how all of his Corvette engines were blueprinted. 

This article was originally published in Vette magazine around 1999.


Kamis, 04 September 2014

Safe Seating

If your seat breaks up in a crash your belts and roll cage are totally useless. Your seat is the primary element in your safety system. A lot of effort has gone into both the design and the materials used to create new, and safer, seats. It’s no longer about the look. It’s all about being safe in a crash.

There are two items of concern. First, we have the issue of the seat itself. Then we have the issue of how this seat is mounted. Even the best seat is useless if it rips out of the floor. One thing is not more important than the other. A great seat does no good unless it’s mounted correctly.

In vintage racing a great deal of attention is paid to the construction of the roll cage and the age of the seat belts. When it comes to seats too many sanctioning groups allow just about anything that looks nice. A brand new 6-point harness won’t do you much good if your seat breaks up in a crash. The various sanctioning groups need to start paying more attention to seats.

Certification

It’s really easy to check on seats. There are two possible certifications. First we have the FIA certification. The FIA Institute is an international organization with the goal of improving motor sport safety. The other certification is from the SFI Foundation. That’s an American based group. There’s no reason to use a seat that has never been tested by one of these organizations.
FIA: One of the current FIA standards is 8862-2009. This certification is required for the World Rally Cup. It’s extremely rigorous and probably not necessary for most of us. Very few seats meet this standard. A much more common standard is the FIA 8855-1999 certification. This specification, along with the date the seat was manufactured, should be found on your seat.

FIA requires that seats be replaced ten years from the date of manufacture. Some sanctioning groups have even stricter requirements. Porsche Club of America requires that the seat be replaced 6 years from the date of manufacture. Some of our vintage organizations need to consider this rule. Most groups have a mandated life span for seat belts but no requirement on seats.

SFI: The SFI Foundation is a non-profit American organization established to issue and administer standards for racing equipment. The SFI is very involved in seating safety. If your seat has passed the SFI certification tests it’ll have a sticker stating both the test it passed and the date of certification. The most recent standard is 39.1 and that’s what NASCAR will be requiring for 2011.

The SFI 39.1 specification means that when the seat is mounted according to the manufacturer's directions the seat cannot deflect more than a given amount and will rebound to the original position. The 39.1 specification calls for less than .250 of an inch of deflection with 4,000lbs of load at the hip; 3,000lbs of load at the shoulder and 2,000lbs of load at the head.

Another SFI specification is 39.2. Once again the test assumes that the manufacturer's mounting specification are followed. The seat cannot deflect more than .500 of an inch and has to rebound to within .250 of an inch with 3,000 lbs of load at the hip, 2,000 lbs of load at the shoulder, and 1,000 lbs of load at the head. These relaxed requirements are used for short track racers who can’t afford the $13,000 seat used by NASCAR.

There is also an SFI specification for the foam used in your seat. It’s covered under SFI 45.2. The critical thing is how rapidly this material compresses and rebounds in the case of an accident. In addition the fabric should also be fire retardant. The FIA requires that the seat meet ISO standard 3795 for flammability.

The Materials

You have some choices here. One isn’t better than the others.  There are quality seats made from aluminum, carbon fiber, Kevlar and fiberglass composites. Each of these materials has a different set of attributes.

Fiberglass: This may be the most common seat material used in vintage cars. Most of the seats are not simply fiberglass but a fiberglass composite with significant strength. These composite seats are economical to manufacture and also lightweight. Even though these composite seats are FIA approved NASCAR outlawed fiberglass seats in 1992. They’re still used a great deal in vintage racing. 
Any number of composite fiberglass seats meet the current FIA requirements. These are good seats and work really well in most vintage cars. The only disadvantage is they tend to be heavier than an equivalent seat made from carbon fiber. Another issue is that some sanctioning bodies require that fiberglass seats use a back brace that’s attached to the roll cage. A lot of drivers would rather not have that brace so they use the carbon fiber seat. FIA does not require a back brace with carbon fiber.

Carbon Fiber: This is very common and it’s used by a huge number of manufacturers. Besides the lightweight there’s an advantage in that this material has a memory. This means you get improved protection in secondary impact. Remember that a crash is normally not just one event – but a series of events that happen very rapidly. Carbon fiber seats have a significant weight advantage over and equivalent seat constructed of fiberglass composite material. A Sparco Evo seat in fiberglass is 19 lbs. The same seat in carbon fiber is 12.6 lbs. You have to decide if 6 lbs is important enough to justify a doubling in cost.

One rather troubling situation is that a number of seats are being made in China that fail to meet normal specifications for carbon fiber. Creating seats out of carbon fiber is rather complex and sophisticated operation. There always companies ready to short cut these processes and put an inexpensive seat into the market. You see these on eBay and the price seems really great. Keep in mind that just because someone says a seat is carbon fiber doesn’t insure your safety. Look for the FIA certification sticker on the seat.

Kevlar: Kevlar seats can be built to meet the FIA safety standards. Cobra has an extensive line of Kevlar seats. Cobra claims a thirty per cent weight reduction over an equivalent fiberglass seat. Since both types of materials can be manufactured to meet FIA standard 8855-1999. It comes down to a matter of how much money you want to spend to save a few pounds.

Aluminum: At one time aluminum was the overwhelming choice for seats. There are still a number of people who believe it’s the best choice. The two biggest suppliers of aluminum seats today are The Joie of Seating and Kirkey. The LeJoie seats meet the SFI standards. They haven’t been subjected to FIA testing though. Europeans have a very strong preference for carbon fiber, Kevlar and fiberglass composites.

At one time aluminum was the standard race seat for almost every sanctioning group in the United States. The aluminum seats are fading from the market. That doesn’t make them bad seats. There is just a lot of competition from other materials. Keep in mind that neither the SFI nor the FIA makes a recommendation regarding seat materials. Both groups are simply concerned with performance in a crash.

Hans Compatibility

There’s a lot of research going on now with the interaction between all of the various safety requirements. You want optimum interplay between your HANS system, the harness system and your helmet. You have to think of this as a total safety system. No single item is going to be useful unless it coordinates with the rest of your system. That’s one reason to find a good supplier and not just order randomly from various web sites.

One way to do this is to make sure you talk to the folks who make all of this safety equipment. They’ve given a lot of thought about how your helmet interacts with your Hans system, which interacts with your harness system all of which interacts with your seat. I believe in the future the seat and harness system will be one integrated unit. That’s already happening at the highest levels. Look for it to filter down to our vintage cars. In this type of seating system the driver is essentially ensconced in a capsule.

Installation

Having a good seat is the first part of the equation. The next part is installing it correctly. It’s paramount that the seat be bolted rigidly to attachment points that are not likely to fail in the event of a crash. The most common way is to bolt the seat to the floor. This usually requires the use of side brackets but each case is unique. Walk around the paddock and look at how different people are installing their seats. Even better ask the tech folks with
your sanctioning group for installation advice.

Mounting the seat back to the cage is one of these items that vary from one sanctioning group to the next. If you have an FIA approved seat you probably won’t be required to use a rear seat brace. The FIA does say though “If the seat is configured for 6-point mounting, an upper seat-bracket must also be provided for the test.” I think they’re telling us to use a rear seat brace.

Also, if you install a new seat you’ll probably need to reconsider the position of the seatbelt anchor points. These should be directly aligned to the force/loads they are intended to take and should have swiveling anchor brackets at the attachment points on the body or cage.

All of this means you need to talk to two every important people. First, check with the tech people in your sanctioning group. Ask them about what seats are approved and what they’re going to be looking for in a mounting system. Next, contact a couple of different manufacturer’s and ask them for a recommendation.

Once you’ve selected a seat that meets the current safety standards you have two more issues to deal with. Will you actually fit into the seat? Now, if you can actually fit into the seat will the seat fit into your car? Most vintage cars have a narrow area for seat placement. This is why you need to deal with an experienced supplier. 

Again, ask about mounting instructions. We used to spend a lot of time talking about roll bars and cages. We’ve come to accept them as part of the hobby. Now we need to think about the science of seating. You can’t enjoy this hobby if you’re disabled from a crash where your seat collapsed. Remember, no one ever plans on crashing. You can though spend some time thinking about what might happen if you do crash.

Senin, 18 Agustus 2014

Heim Joints

When the British shot down a German plane in early 1940 they found a rather interesting connection in the aircraft's control system. This unique connection was what we’ve come to call a spherical rod end. In the UK the patent was given to Rose Bearings Ltd.  That’s why British call them Rose Joints. In North America the H.G. Heim Company was given an exclusive patent to manufacture these joints. That’s why in the United States we call them Heim Joints. They’re the same thing.           
            
High quality economical spherical rod ends really didn’t appear until the late 1970s. A Japanese company, N.M.B, produced these spherical rod ends. The reason they were so economical was that they were selling them for less than it cost them to manufacture them. The United States government asked them to please leave the marketplace so they purchased a U.S. company, N.H.B.B. (New Hampshire Ball Bearing) and continued production. You have to love it.
            
Today over fifteen American companies make rod ends. These products run the gamut from the stamped steel bodies used in control links for garden tractors to the 17-4 PH stainless units found on nuclear submarines.
            
Racecars use Rose-joint or Heim-joint rod ends because they have zero-play and zero elasto-kinematics. A normal automotive suspension arm will have rubber bushings at the chassis ends and a ball joint at the wheel end. Only the extreme street performance cars like the Ferrari Scuderia or Porsche 911 GT3 RS use heim joints.
            
The first joint normally that’s converted to a rose is usually the ball joint. This is because the camber on the wheel can easily by adjusted by moving the ball in or out relative to normal. Next, a serious racer would have rose jointed inner arm bushes and then able to adjust caster and dynamic angle changes during suspension compression and rebound.

Two Types: The standard two-piece heim joint consists of a body (race) and a precision ground and heat-treated steel ball. This is essentially a spherical bearing. This type of construction allows the rod end body to carry a substantial radial static load while at the same time offering substantial misalignment capabilities.
            
Next is the three-piece style that consists of a body, ball and race. This type of rod end features fully swaged bearing construction. The advantage is that there is spherical conformity between the ball and race. The three-piece heim joint also offers increased flexibility since different types of materials can be interchanged in each component part.

Quality Levels: The range of quality is astounding and very confusing. The labels used by different companies make no sense at all. You can buy a 3/8x3/8-24 rod end for $4.37. The same size in aluminum will cost you just over $16.00.
Or, you can pay over $20.00 if it’s constructed of chromoly steel.
            
Pegasus Racing (www.pegasusautoracing.com) has the simplest advice. It the rod end is for the sway bars or the shift linkage just buy the cheapest ones. If it’s for the steering linkage or the suspension then buy the expensive ones. Just stay away from the middle of the price range. The expensive rod ends should have both a hardened ball and a hardened race.
            
Let’s consider how many rod ends you actually need. If you have a formula car or a sports racer I’m thinking 6 to 8 at each corner. Let’s just round it off to 30 so we can work with even numbers. If I buy the cheapest rod ends I can find I’m going to spend around $150. It will at least be under $200. Now lets get the finest we can buy. The bill might reach $600. That means the difference between the cheapest and the best might be less than $500. How much did your last motel bill come to?

Maintenance: Rod end bearings don’t like dirt. Grease is a major issue since it can combine with dirt to create a grinding compound. On racecars the spherical bearings are fully exposed and take a battering from the elements. This means you have to clean them on a regular basis.
        
The folks at Pegasus simply water blast the suspension when they return from the track. Then they blow the excess water away with an air gun. This is followed up with WD-40 to get rid of any remaining moisture. They can do a formula car in less than thirty minutes.
          

Lubricating Teflon lined rod ends won't accomplish anything for you except to make them collect dirt faster. If the rod end is of good quality, and the ball is still snug in the Teflon, dirt isn't a real problem as the edge of the Teflon acts as a wiper, keeping the dirt out. It's only when the ball becomes loose that getting grit inside is a problem. At that point they need replacement anyways.


Rabu, 06 Agustus 2014

Exhaust Headers


All of our cars have exhaust manifolds. Some of us are even using the stock manifold that came on the car when it was new. Others have spent thousands of dollars on the latest and greatest header system. Before you get your checkbook out you need to think about a few things. Am I spending all this money to go faster? Or, am I concerned about what people think when I open the hood? Maybe it’s a little bit of both.

Materials: We have a number of choies here. About eighty per cent of all aftermarket headers are coated mild steel. Stainless steel though is becoming a popular replacement material for exhaust headers. Just keep in mind that not all stainless is the same. The folks at Burns Stainless point out that technically, Stainless Steel is a trade name applied to what are known as corrosion-resistant steels. They believe that “It is a fabulous material that outperforms mild and alloy steels in so many different applications in racing that no other material can match it.”

A three-digit system is used to identify stainless steel but we need to focus on what is called the 300 series. Type 304 is a popular choice for exhaust systems. It’s also the least expensive. Another good choice is stainless 321. Jim Browning of Ultimate Headers (ultimateheaders.com) prefers the 321 because it’s about fifty per cent stronger than the 304. This means you can use a thinner sidewall thickness and save some weight. Weight is always a big deal with racecars.
A number of firms have recently started using 400 series stainless. You want to avoid any of the 400 series products.  These are simply not as durable or as resistant to corrosion as the 300 series. You can do a really quick test with a small magnet. A magnet will not stick to anything in the 300 series. It will though stick to the 400 series. You can practice this test on your barbecue grill.

One advantage that stainless has over mild steel is heat retention. Stainless steel will hold the temperature of the exhaust gases in the primaries much longer. We want to keep as much of the heat inside the exhaust manifold pipes as we can.

Inconel 625 is another popular choice for exhaust manifolds. Although the name "Inconel" is a registered trademark of Special Metals Corp., the term has become something of a generic reference to a family of austenitic nickel-chromium-based super alloys which have good strength at extreme temperatures and are resistant to oxidization and corrosion. Inconel's tensile strength and toughness at elevated temperatures allows for a very thin sidewall. This means your exhaust manifold is lighter.
  
All Formula 1 cars and a number of Sprint Cup teams use Inconel for their headers because of the weight savings. Some NASCAR teams are routinely using headers made from 0.020-inch wall Inconel tubing. One problem is that these header walls are so thin that you can easily damage them during installation. Given that Inconel is incredibly expensive I don’t think we’ll see a lot of Inconel header is vintage racing.

The Flange: This is the part of the exhaust manifold that goes right up against the cylinder head. We have some compromises to deal with here. The thicker the flange is the better the seal is. A thicker flange will simply be more durable over time. A thicker flange though means more weight. Even worse is that this extra weight is up high. Exactly where you don’t want extra weight.

Years ago everyone built header systems with a 1/4-inch flange. Today everyone is building headers with a 3/8-inch flange. The one exception is if you’re running a turbocharger. In that case a ½-flange is usually used. The best material seems to be an investment cast stainless steel flange.

Wraps: We want to keep all the heat inside the exhaust system as long as possible. Hot exhaust gases have greater velocity because they are not as dense. As the exhaust temperature cools the velocity slows. These wraps allow you to maintain the temperature of the exhaust gas.

Actually the wraps do the same thing as the high-tech ceramic coatings. They just do it a lot more cheaply. They do have one huge downside. They don’t look period correct.        Presentation is very important in vintage racing and a lot of people just don’t think that exhaust wraps look all that good. While we seldom worry that the inside of our engine is period correct we do spend a lot of time making sure that at least the engine compartment looks period correct.

Coatings: If you decide that a wrap doesn’t look all that period correct on your vintage racer you can coat the exhaust manifold to keep the heat inside the pipe. Remember though that there are two very different types of coatings.

First we have the cosmetic coatings. The only thing they do is make your exhaust header look look shiny. These low-tech coatings are nice looking but they do very little to insulate the exhaust or increase your power. You want a thermal barrier that keeps the energy in the header. Keeping the heat in the pipe lowers the temperature in your engine compartment and more importantly it keeps exhaust gas velocity high. These thermal coatings are usually about 0.15-inch thick as opposed to the cosmetic coating, which are seldom more than 0.002-inch. Swain Tech Coatings (swaintech.com) has a ceramic coating that normally reduces radiant heat by about fifty-five percent.

Most people feel you can skip the internal coatings. It’s virtually impossible to prepare the internal surfaces of a pipe to receive a thermal coating and these coatings can easily become detached. Even a thin paint can reduce the available flow area by up to 2% giving rise to reduced engine performance. You just need to worry about the exterior of you exhaust system.
               Originally Published in